Computer graphics. Bitmap program
 Now, a free bitmap software available for Linex and
Windows. The GIMP. Like Photoshop, it has plenty of features
that allow us to undertake tasks as easy as changing a
colour photograph to make a cool logo or an animation. The
best way to understand how it works is to practice from the
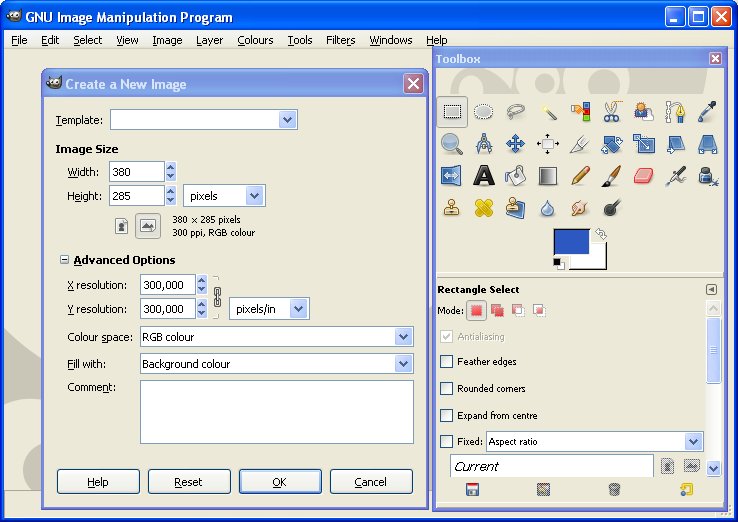
beginning. The fist time you open the program, two windows
will appear on your screen, the principal window and the
toolbox window. The fist one has a 10 item menu with options
like Open file, filters, layer, etc.The second one shows us some tools which are useful for
manipulating images. As said before, the best way to learn,
is to do it yourself. As Confucius said:
I hear and I forget. I see and I
remember. I do and I understand.
Text over the image
Sometimes you need to add some text to a photograph or
illustration. In such cases, we will need to paste a word
onto an image.
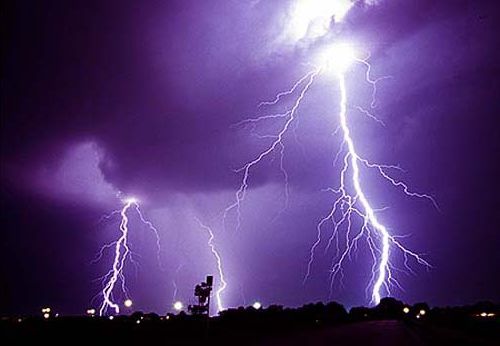
It is as easy as:
1. Download the image you want
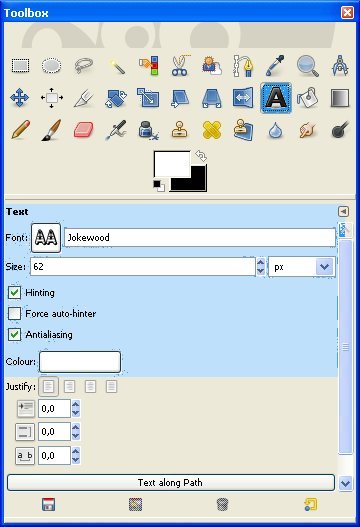
2. Go to the tool box and select A ( marked in blue in
the next image )
3. Below the tool icons there is a Text menu where you
may select the font, fontsize … Choose the font and size
you prefer and write a word.
That’s all. A very simple exercise to
begin with!
Using Gimp to make a Button.
Many websites incorporate a cool Web 2.0
button and it is time to try and do this ourselves, so, if
you are ready, lets get down to business.
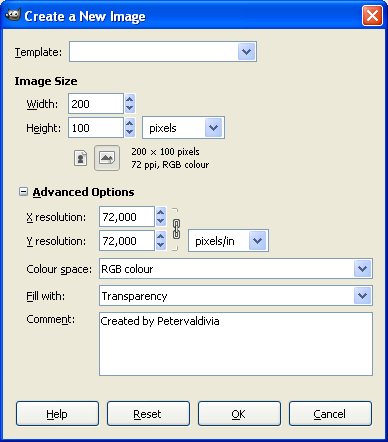
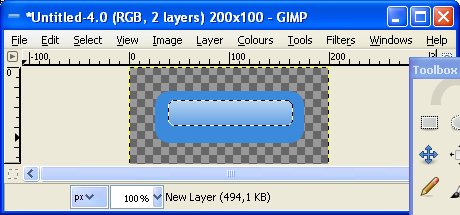
1st step, as usual, create a new image
with 200 width and 100 Height and with a transparent
background.
Step 2: Create a rectangle ( click on
![]() )
)
with the width and height of the web 2 button we are going
to generate. To give the rectangle rounded edges
->Select->Rounded Rectangle on the menu bar. The next image
will show you the route
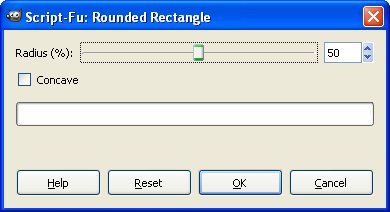
The window with the script (a small piece of software
which will run tasks in a program ) will allow you to change
the radius. Choose a value between 40 and 60%.
Step 3: Click on the bucket and fill it with a bright
colour like #3b8adc.
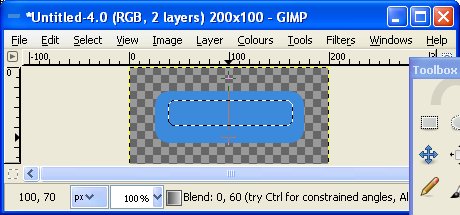
Step 4: Create a small rounded rectangle inside the big
rectangle at the top. Repeat the methods described before.
Now you should have something like this
Step 5: Go to the gradient tool and select the starting
and finishing points with the mouse. Have a look at the
image again and you will see the two points for the
gradient.
Now you have this:
Step 6:
Add the text using the text tool(![]()
). In font types you can choose whatever you want.
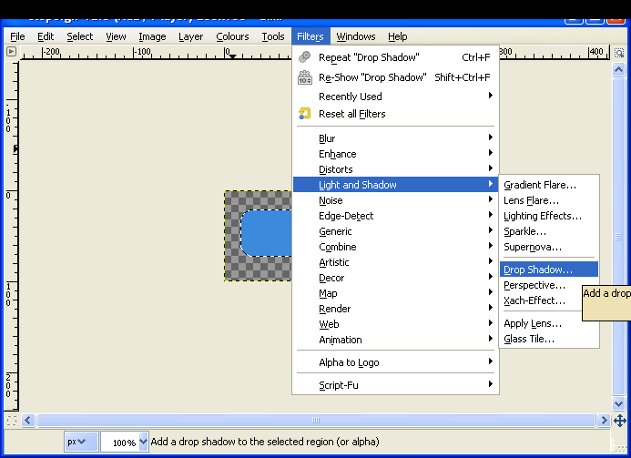
Step 7: Show the layer menu clicking Alt + L. Select the
layer with the big rectangle and give it a shadow by going
into Filter and clicking on ->Light and Shadow and then ->
Drop Shadow ( see next figure )
Step 8: To see the full effect of the shadow, add a new
layer with a white background. If you leave that layer on
the top, you will just see a white image. Move it to the
bottom of the layer stack using the layer menu. Just at the
foot of the layer menu, two arrows will permit you to move
the white layer down
That’s it! This is the final image.
Another one using Black Chancery Ultra-Light font

Layers:
When you see an image your impression is
that what your seeing is just a piece of paper on which
somebody has drawn something or that someone has taken a
photo, but this is not exactly true. Sometimes there are two
or more bonding images. These images are anchored to a
layer. You can think of layers as a stack of slides or as
the layers of clothes on your body. Each layer can be
manipulated without affecting any other layer. This is very
important, because if you don’t like a” part of you image ”
you can rearrange it all very quickly “.Layers are stacked
on top of each other and once you add a layer, the image
window will tell you how many layer your image is comprised
of (
see fig 5 ).
If you need to open a layer menu, just
click on the Control key + L
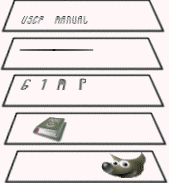
Adding the 1st
layer + 2nd layer + 3rd layer + 4th
layer ( with some transparency ) + 5th layer
we have the image shown below. The “Layers” dialog (
which opens in a new window ) is the main interface to
manage your layers and in it you can add a new layer, erase
an old one, modify etc. The advantage of using layers is
that you can construct an image and later modify it without
affecting any other layer of the image.
Creating Badges using Gimp
1st step: Open a
new image, 200×200 size and select a white background.
2nd In order to
make a 12 sided star, go to ->Filters->Render->Gfig
A new window will open and a tool menu will show you the
properties to adjust. ( see fig below )
 3rd
3rd
Select the star tool
![]()
and increase the number of sides to 12.
4th Step: Click
‘Browse’ and select a small brush, eg a 1 pixel brush.
Now click in the middle of the square and drag it to
anywhere inside the image. A star will appear as you move
the mouse.
5th
![]()
This is the Move Single Point tool. Click on that tool, go
to the star and move the corner of the star ( a black point
on the outside ) to create a star badge
6th Click on the “close botton” and the star should pop
up in the previous window. Now, you have two layers in the
Layer stack. ( see right )
7th
Step: Choose the ‘Fuzzy select tool(
![]() )
)
and click inside the star and the star border should be
selected.
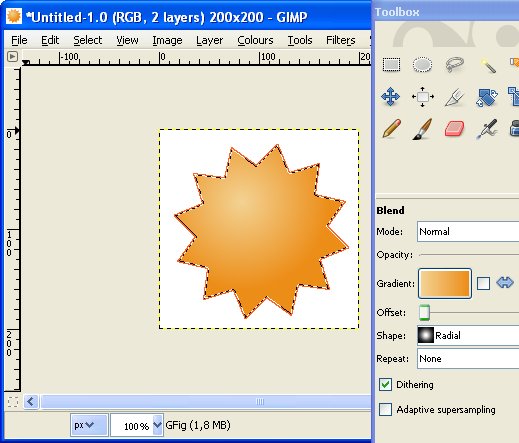
Step 8: The gradient:. For that, choose two different
colours. I have chosen two oranges. I used #f3d293 as the
primary colour and #f9a70a as the secondary colour. Then set
the -Shape- into the gradient tool as Radial. Click in the
star to choose the starting point and the finishing point.
You should get something like this.
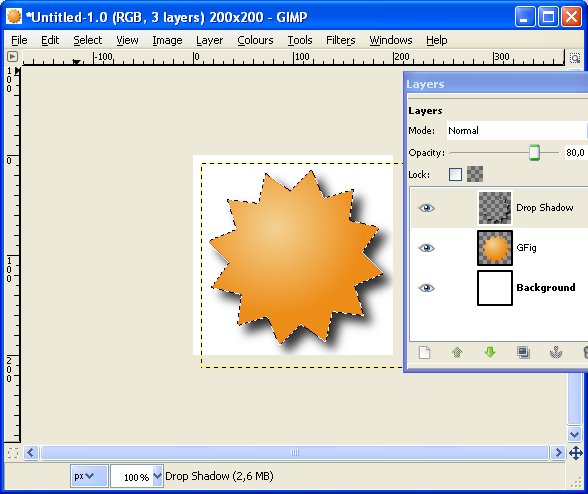
Step 9: The Shadow. The best way to select the full star
is by clicking outside the star. In that case what we have
selected is the outer area ( everything other than the
star), so inverse the selection using ->Select->Invert’ or
(click Ctrl + I). Now we have selected just the star.
Step 10: Go to ->Select ‘Script-Fu->Shadow->Drop-Shadow’
and make sure that the values are set to: Offset X : 8 ,
Offset Y : 8 , Blur Radius : 4 . Try with other values if
you want to play with it. Then click OK. Now you should have
this..
Step 11: Select the text tool and write whatever you
want. First fit the text area inside the star. This is what
I had in the end.

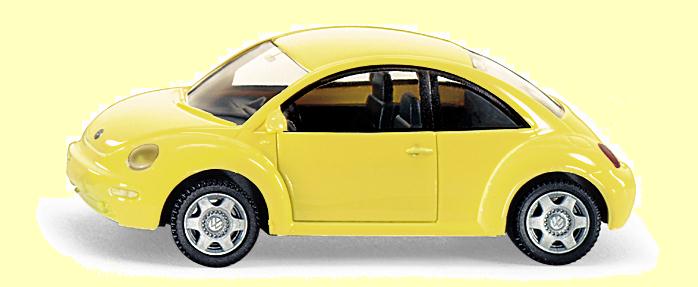
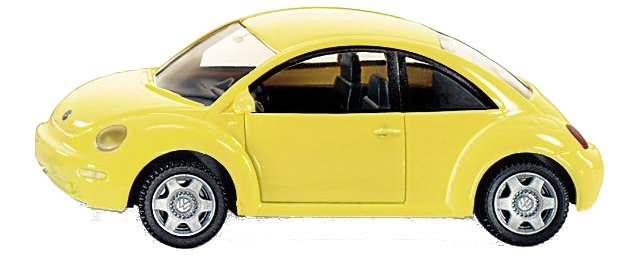
Yellow beetle
An easy first layering exercise is to place an object in
the background. In this exercise, we are going to surf the
internet, choose a car, get rid of its background and then
place the image over a sea background.
The yellow beetle is an easily workable image. Go to the
magic
![]()
and select the yellow background. Then start to rub it out.
Carry on with all zone until you get to the yellow car. Use
the eraser if needed. ( see yellow car 2 )
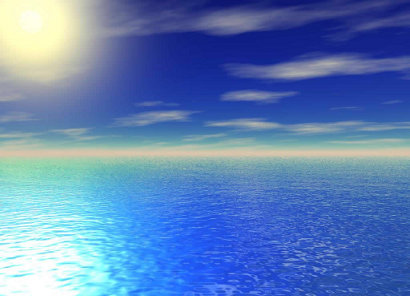
And now, a large and wide blue see background:
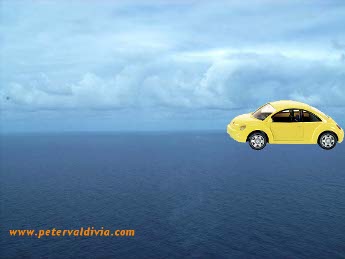
Simple Animations with Gimp
What happens if layers do not appear at the same time.
Images in layer 1 appear at Time 1, and layer 2 at time 2
and so on. Do you remember what Walt Disney did to make
Mickey Mouse move? Now, you’ll learn how to use layers to
make a dynamic image or gif. Using GIMP as an animation
software requires you to think of every layer of the image
as an animation frame. It is important that layers can be
both replaced or combined, so there are two options. You
will want to stage each frame separately. 1st As one frame
per layer (replaced) and 2nd Cumulative layer ( Combined) In
the first case, each layer disappears as the next layer
appears and in the second case, all the layers stay on the
screen at the same time. Let’s move the beetle car along the
sea!!!!! 1st Step. Take a sea background and paste the car
on top. Save as frame1.jpg. Repeat for frame2.jpg but the
car, should be placed a little further to the left. Carry on
until you get about 12 or 14 images of a car on the sea,
each one a little further to the left. Now, let’s make our “Disney
book“. 2nd Step: Open the first image. Then Go to File
–Open as Layer– Choose layer2.jpg 3rd Now you have two
layers in your exercise. Check by clicking Alt+L.
 4th
4th
Step: Do Step 2 as many times as images you have saved 5th
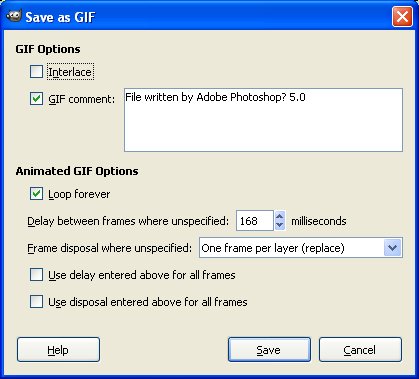
Step: Go to File–Save as –car-on-sea.gif. It is very
important that the file is saved as GIF because gif files
allow animation while jpg files don’t. 6th The next window
will show some gif animation options. If you select loop
forever, the animations won’t stop. The Delay between frames
is the time between one frame and the next and the frame
disposal is the way the frames will be shown. Once it is
done, open a browser and select your work. 
Exercises.
Make a banner with a logo and some text. It should be
like the following banner
![]()
Exercises:
 Give
Give
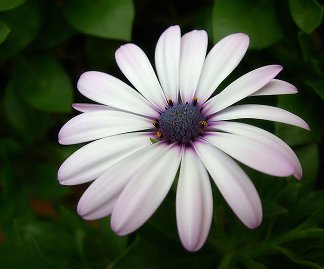
a Show to a Flower.
Download a nice flower or use this one. To download,
click on the right mouse button. In this exercise we are
going to use The Magic Wand, a very attractive tool
situated in the first row, it’s the fourth tool. The magic
wand selects areas by grouping pixels that are similar in
colour and that are are spatially connected in some way .
Click on the image and select the area to remove. If you
want to eliminate the green zone, once you have selected the
area, push Ctrl + X keyboard keys. Depending of your skill
the next image would be, more or less, like this:
It’s easy once you’ve got the hang of it.
Now, let’s go to another interesting tool. The eraser tool,
represented by a rubber![]() .
.
A trick, in order to get a clear image, is to use the zoom
tool
![]()
or push the + key in the keyboard.
Satisfied?
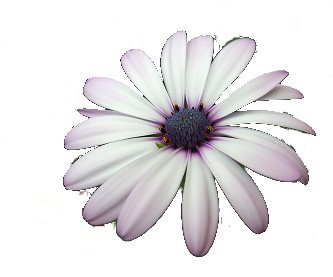
Go ahead and try with another one.
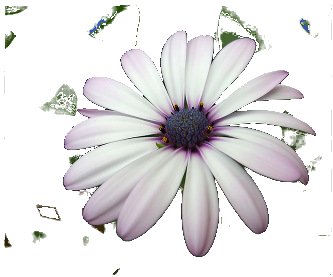
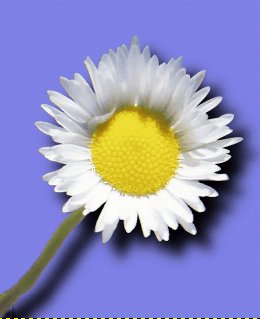
Here , a daisy in which we have applied all processes we
applied before, but in this case, with a transparent
background . It is important to note that cutting produces a
transparent background ( gray squares ) only if the original
image layer has an alpha channel.
Before we do anything else, let’s apply a filter, in this
case, Route: Image: Filters/Blur. Now the image is cleaner.
Now it is time to create the shadow. Choose the Bucket Fill
tool and select the black colour. Fill up the daisy with
“black paint ” and you will have something like this: After
this, The blurring can be performed as before, but the route
changes. See figure 5 where it is shown.
A Gaussian Blur ( type IIR) is used with following
values: radius of 20, Offset x = 15 and offset y = 15.
Colour black and opacity 100%. You should have a window and
an image similar to the following:
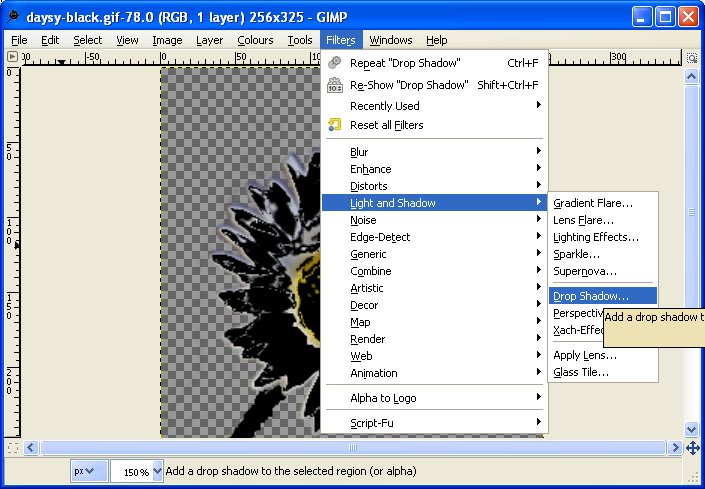
Fig 5
All that remains is to place the shadow and the flower
( two layers ) over an appropriate background ( third
layer ). Choose whatever you want as a background but a
solid colour would be perfect.
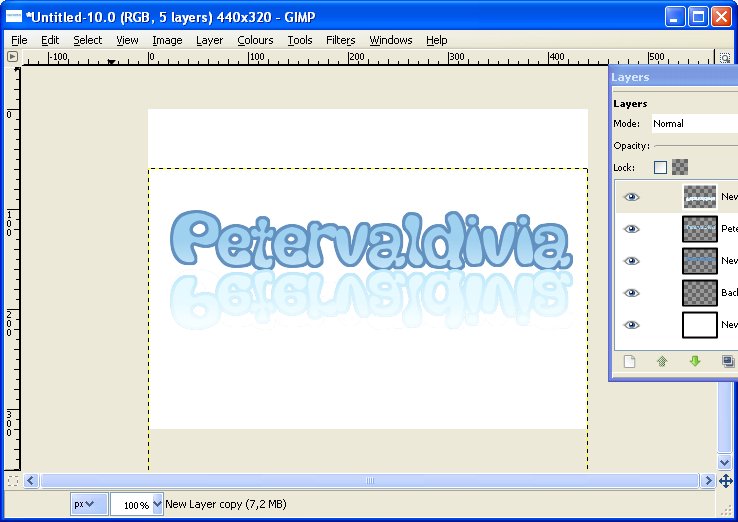
Creating Reflections for Logos
Step1: Open a new image 440×320 and from the Tools Dialog
select the Text Tool. Then choose your font and letter size.
This is our fist layer that should be renamed “text”. Step
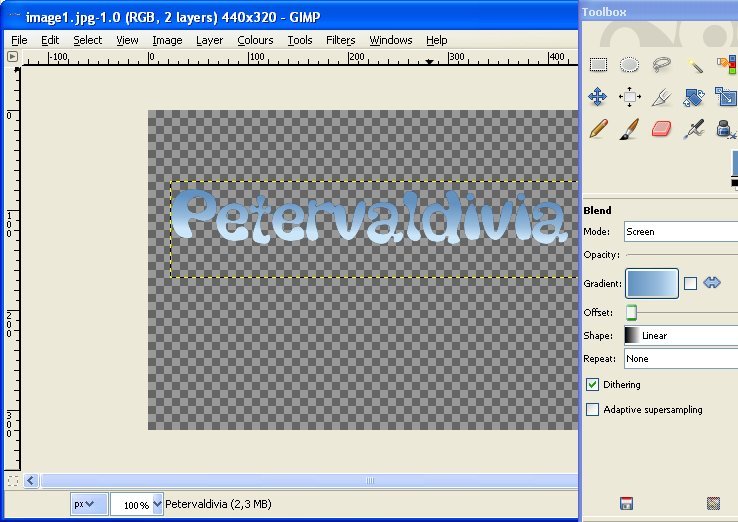
2: There are many gradients on the gradients tools, but we
are going to use a new web 2 grey blue. Probably your Gimp
Version does not have that gradient, so download it here .
To install, unzip and place all files into
\.gimp-2.2\gradients. Step 3: Now that we have the Gradient
colour, in gradient tools, select Screen in Mode and the
Shape as Linear. Have a look at the following image. Place
the mouse below the text and drag from the bottom to the
top. You should have something like this…
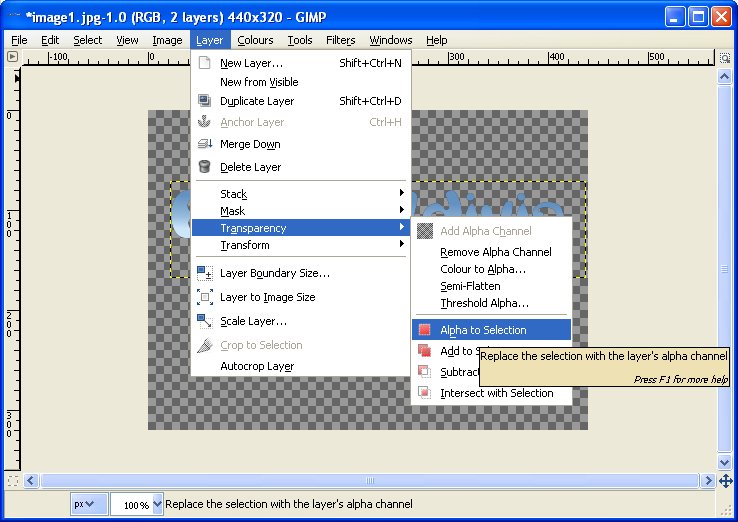
Step 4: Making an outline. It’s easy, it just takes a
while to figure out. Go ahead and select the “main text”
layer and then, as shown in the next image, select “Alpha to
selection”.
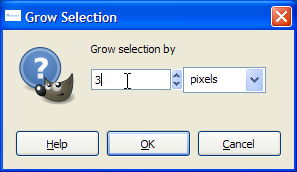 Step
Step
5: Go to Select->Grow to access the “Grow Selection menu”.
Set it to a 3px. Step 6: After doing the step 5, you can see
that the outline has got a bit wider. The next thing is to
create a new layer, with a transparent background, and the
shape of the grow outline which will be filled up with an
appropriate colour. Go to Layer->Create new Layer and Name
it Border2. Fill it with 6291c0 colour using the Bucket
Fill Tool. It should look like this:

Step 7: A reflection is a copy of an image that is paler
and less defined. Duplicate the Main Text layer and the
border2 layer. After that, merge both. First move both onto
the top of the layer stack and click on Layer layer-> Merge
down, to merge them down. Rename the new merged layer as
Reflection. Step 8: Click on Ctrl + L to see the layer menu.
Click on the eye to select the reflection layer and
De-select any other layer. Make sure the Flip tool (![]() )
)
is on vertical mode. Then drag upwards to finally flip it.
Step 9:In the new layer, select the Gradient Tool in Blend
mode ( Screen ). Apply it to the reflection layer from
bottom to top, or from top to bottom depending on the
gradient set. Mix all layers.
Here is the final result

Sun Rise Header Graphic
This tutorial will allow you to create a nice sun rise
vista. First off all download the last version of GIMP and
two types of brushes. To download click on
floral brushes and
grass brushes.
After downloading them unzip and place them in
GIMP-2.0\share\gimp\2.0\brushes or whatever you have
installed your last version of GIMP. Everything ok? Are you
ready? Then let’s get down to business.
Step 1: Create a new image. You are free to make it
whatever size you want, depending on what you have in mind.
For example enter a 620x220px for a header or footer banner.
Step 2: We are going to start with a transparent background.
First create a new layer and from the toolbox select the
Gradient blend tool. (Blend-> mode screen ). Go to your
colour box and enter ffc662 for the background colour and
ff6c00 as your foreground colour. Step 3: Apply it so that
the dark orange (ffc662 ) starts from the top and the light
orange (ff6c00 ) is at the bottom. The next image will show
you what it should look like.
 Step
Step
4: Go to Layer->Create a new layer with transparent
background and use the ellipse tool to draw an oval shape.
The axel of the oval must be at the bottom of the canvas.
Leave some distance at the top, right and left. Then go to
Select->feather and set it to 100px. Finally, choose a
yellow colour (eg # fffe96 ) for the foreground and fill the
selection in using the paint bucket.


Step 5: Do step 4 again but this time draw a circle. Then
go to Select->feather and set it to 50px. Now, instead of
filling it in with yellow colour, fill the bucket up with
white paint and spill it into the selection area. Above this
paragraph, on the left you will see steps 4 and 5
illustrated. Step 6: In the Stack layer, select just the
last layer and select the brush tool ( situated in the
toolbox ). Then select “Circle Fuzzy (17)” and scale the
size to around 6.78.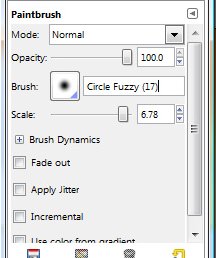
Step 7: Apply a few strokes to the bottom of the layer. It
is going to be the ground for the grass. It should be just a
few pixels wide. Have a look at the next image.

Step 8: Time to grow grass. If you click on brush (
paintbrush tool ) you will see the new brushes we installed
at the start. There are three types of grass and some plants.
Play with them and add them to the ground.
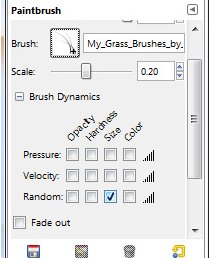 For
For
the grass, set the scale size to 0.19 and tick the random
box. This menu will only open if you click on Brush Dynamic.
Once our bottom is filled with small grass we can go ahead
and add a new grass type. Select larger grass and randomly
mix with the other grass brushes. Step 10:In the final step,
we’ll add the floral vines brushes to our scene, at the
right and at the left. Change the Scale to a value that fits
your scene, about 5 or 6. Step 11: If you want to add some
text, go to layer-> add new layer and write whatever you
want. Select all the layers and you should have something
like this:
Adding life to your favourite Photograph
A picture is worth a thousand words is a old proverb
and it is true. So if the image is a superb image, we could
say: a picture is worth 5 thousand words.
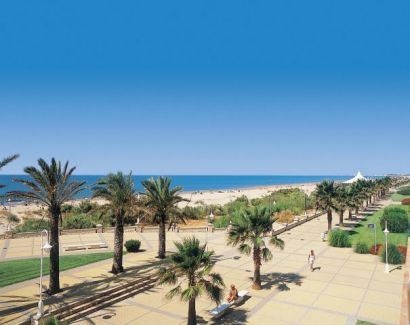
In this tutorial we are going to
enhance a photo. Fist of all, download the photo and a
nice wallpaper as shown below.
Step 1: Using the Fuzzy select tool (
![]() )
)
select the area you want to eliminate. In this case, the
blue sky. Just select and eliminate as many closed areas as
appear in the photos. Use the eraser and a 1 pixel brusher
to erase small defects. You should have something like this:
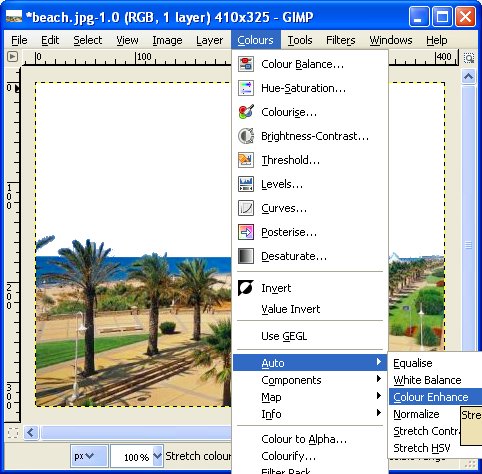
Step 2: Observe that after eliminating the blue sky, the
background is white. We want a transparent background, but
first it needs a touch of colour, so go to Colours->Auto->Colour
Enhance. Then use again the fuzzy select tool and click in
the white are. Then go to Select->Invert and later, Key
Control + X . Now we have the photo in the
clipboard
Step 3: Open a new layer with transparent background and
the same size as the old photo. Move the image downwards.
Step 4: Go to ->File->Open as layer and pick the
wallpaper. It should be opened sized already to the size of
our layer, so if you didn’t do it before, please resize the
wallpaper image. Now we have to layer. Move up the first one
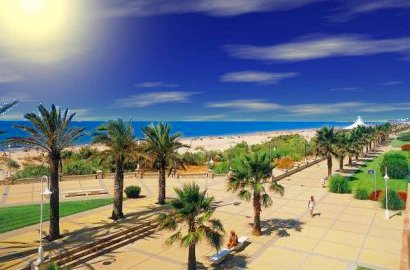
and leave the wallpaper down in the stack layer. That’s it,
here is our beach photo:
Dictionary:::
Blur : making confused in form or outline;
make indistinct: example The fog blurred the outline of
the bus.Enhance: to raise to a higher degree,
intensify and magnify.Clipboard: An area in memory where cut or
copied text and graphics can be temporarily stored
before being moved to another location.