Helicopter Assembly Details
6.3 Preparation of the undercarriage
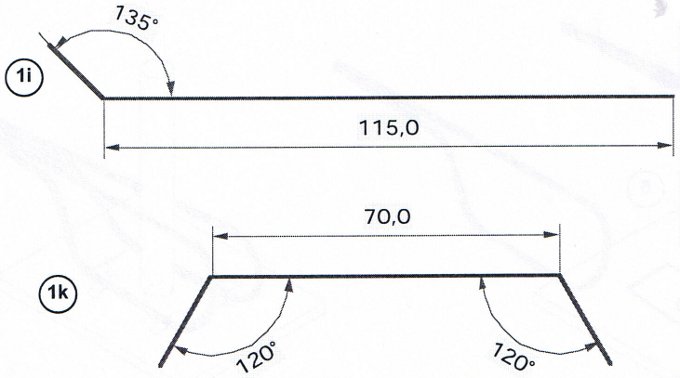
6.3.1 Get 4 pieces of 130mm (1i) and 2 pieces of 110mm (1k) from two rods (1). Polish
6.3.2 Bend one of the ends of the 130mm rods at an angle, as shown in the drawing and on the plan on page 19.
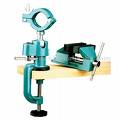 Note: If possible bend them in twos using the vice ( see illustration on the left )
6.3.3 Bend the pieces (1k) of 110mm at at angle at both ends, as shown in the drawing and in the plan on page 19.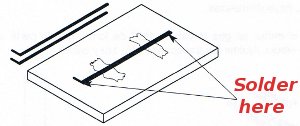
6.3.4 The pieces (1i) should be soldered together at the ends to form the landing runners.
Note: Place the pieces (1i) on the heat resistant base and secure them with adhesive tape, as shown in the drawing.
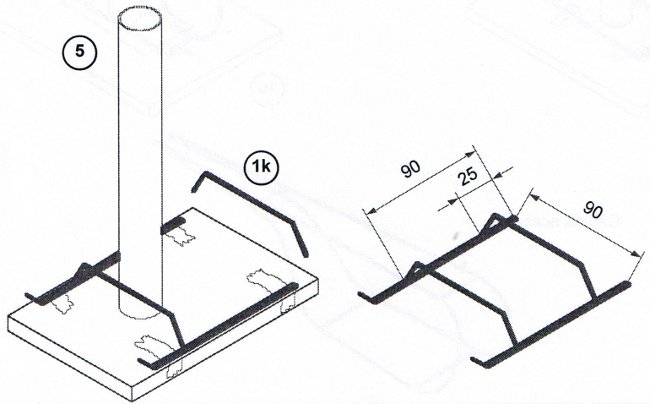
6.3.5 Once the runner are soldered, align them in parallel with a distance of 90mm between them and fix them in place with adhesive tape. Then place the two crossbars at right angles at 25mm and 90mm from the far end. Solder. See picture.
Note: Use an aluminium tube (5) to keep the cross bars perpendicular
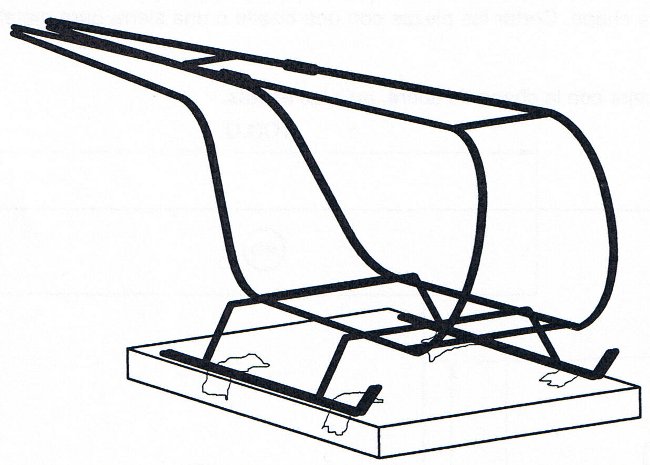
6.3.6 Keep the undercarriage on the base and solder the cabin.
Note: Start by heating the point to be soldered with the soldering iron and then put the wire solder in place.
6.4 Preparation and assembly of the main and rear rotors
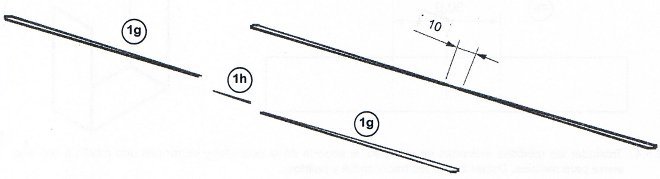
6.4.1 To make the main rotor, get two pieces (1g) of 320mm and one piece of 25mm (1h) from two metal rods (1). Polish the ends.
6.4.2 Mark the pieces (1g) in the middle and double them as shown in the plan on page 19.

6.4.3 Align the pieces (1g, 1h) as shown in the plan on page 19 and solder them.
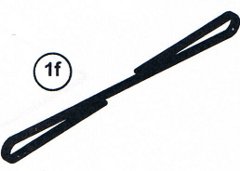 6.4.4 You will need one metal rod (1f)of 100mm for the rear rotor. Polish the ends and bend as shown in the plan on page 19.
Note: Bend one end to the right and one end to the left.
6.5 Preparation of the supports for the candle, radiator and the main rotor.
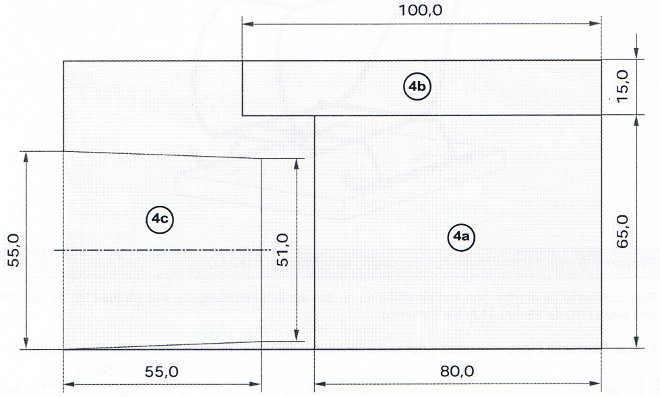
6.5.1 Transfer the measurements of the pieces (4a,4b,4c) on to the copper sheet or cut out the plans on page 19 and stick it to the sheet. Cut the pieces with metal shears ( see on the left ) or a hacksaw. Polish them.
Note: before working with the copper sheet, polish the edges.
6.5.2 Saw the aluminium tube (5) into equal pieces. Polish the ends.
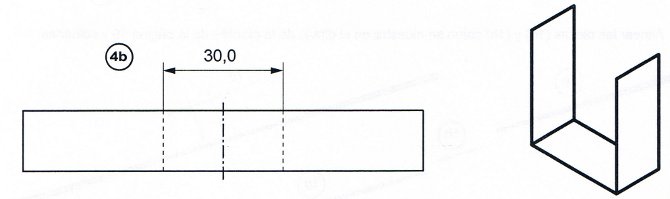
6.5.3 Fold the copper piece (4b) as shown in the picture.
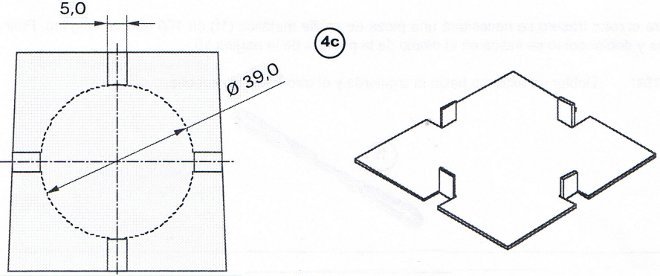
6.5.4 Transfer the measurements shown in the drawing to the candle support (4c) and cut with metal shears or a hacksaw. Bend the pieces upwards and polish them.
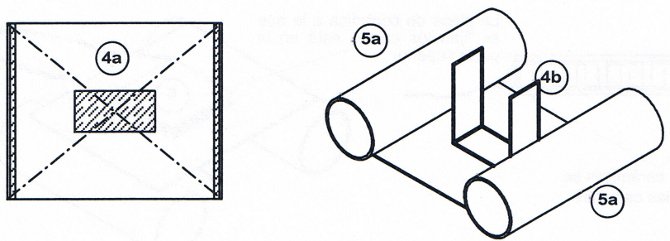
6.5.5 Fix the aluminium tubes (5a) and the motor support (4b) to the radiator base (4a) with two component glue, as shown in the picture. Put a thin layer of glue in the places indicated. The tubes will hold with adhesive tape.
Note: Before putting flue on the places indicated you should rub them with sandpaper. Pay attention to the manufacturer’s instructions on the glue. You should prepare the glue, to stick the siren beneath the candle support, at the same time.
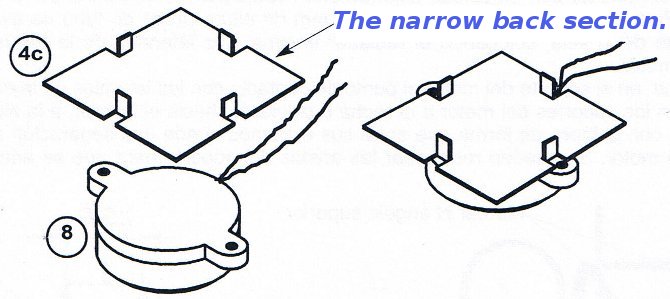
6.5.6 Glue the candle support onto the back of the siren (8), directing the siren’s cables towards the narrow back part of the candle support, as shown in the diagram.
6.5.7 When the glue is dry, cut the black siren cable down to 40mm, peel one end back and solder. Prepare more two-component glue to stick the thermoelectric cell to the radiator and the siren to the base of the cabin.
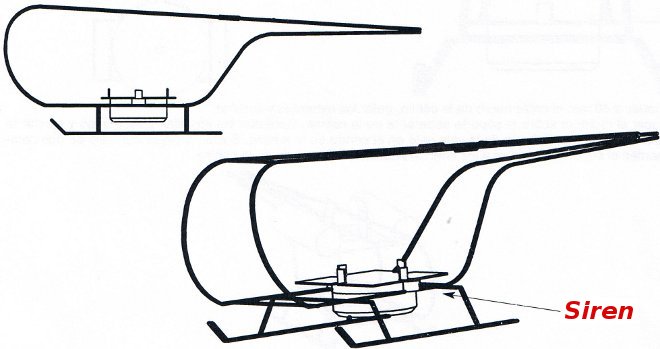
6.5.8 Stick the siren down with the candle support in the centre of the cabin, placing the narrow back section and the wires facing the back. See drawing.
6.5.9 To avoid overheating destroying the Peltier cell, place a drop of two component glue on the four corners of the cell.
Glue the ceramic plate (6) onto the base of the radiator by the side that doesn’t have the wires soldered to it, as shown in the picture.
Note: use a very thin layer of glue. The thinner the level, the better the diffusion of heat. Stick the cell down using rotating movements.
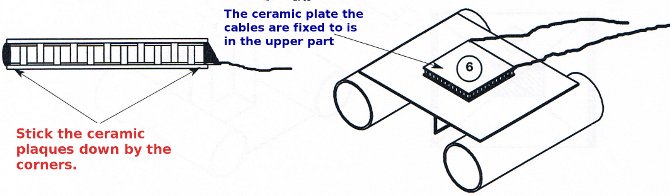
1.The ceramic plate the cables are fixed to is in the upper part
2.Stick the ceramic plaques down by the corners.
Goods : Supplies, possessions
Signs: a notice, warning, or advertisement, that is displayed for public view. eg. a traffic sign.